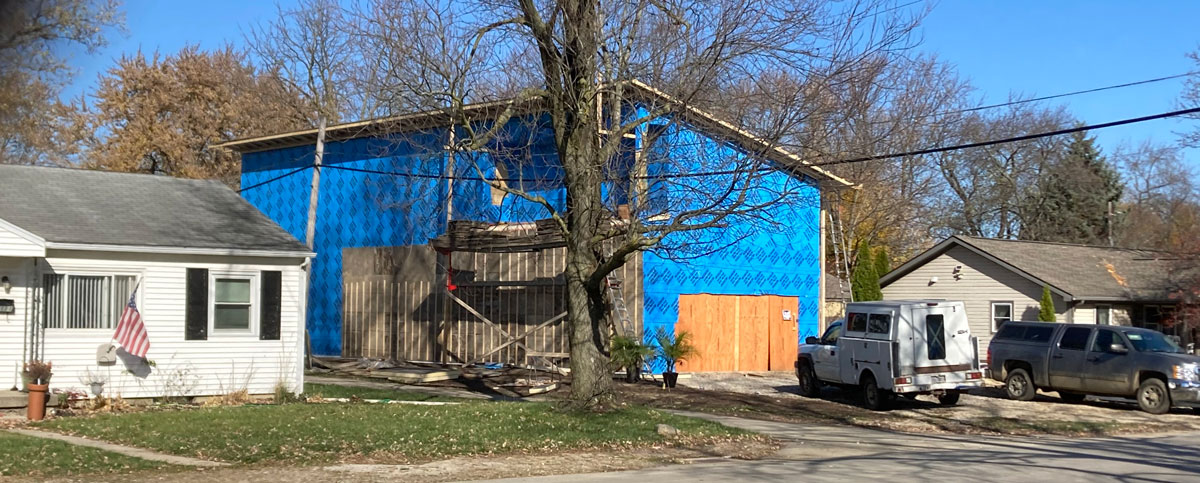
In an energy-efficient home, the right insulation details are critical. I have a continuous layer of insulation around my entire building envelope. I used multiple layers of XPS foam on the walls and in the foundation, and used polyiso on the roof. Read on to learn more about my design, product selection and installation.
We have successfully built Hilliard’s largest Yeti cooler! A continuous barrier of foam gives us an exceptional thermal envelope. We should be comfortable for days if the power goes out – even in this great Ohio weather.
How is My Insulation Detail Unique?
In a typical residential home, insulation is placed between studs in the wall cavity. There are many different materials that can be used, but cellulose and fiberglass are among some of the most popular.
Although this is a great thermal barrier, it is not continuous. Most houses are framed with studs every 16 inches. Therefore these houses have thermal bridging every 16 inches. These are essentially holes in the home’s thermal envelope. Who wants to wear a coat with holes in it?
My home has a continuous thermal blanket of foam. I have 7” of foam on the roof deck, 3” of continuous foam on my walls, and 3” in my foundation. Who doesn’t want a thick blanket around them on a cold day?
I Used XPS (Expanded Polystyrene) Foam for the Walls
XPS is a closed-cell rigid foam board, used for insulation. I chose XPS because of its moisture-resistance, durability and high R-value.
I used two layers of recycled XPS foam as the insulation for my walls. It came in 2’x4’x1.5” sheets. (See more about installation details below.)
I also got my foam for a killer price. When I quoted it from my local building supply store, I was looking at about $30,000. I then started looking into recycled options. I was able to get a semi load of foam from a commercial building in Georgia for less than $5,000. It was pretty dirty, and there were some damaged pieces that I wasn’t able to use. But I saved about $25,000, and also got to save space in a landfill. Energy-efficiency times two!
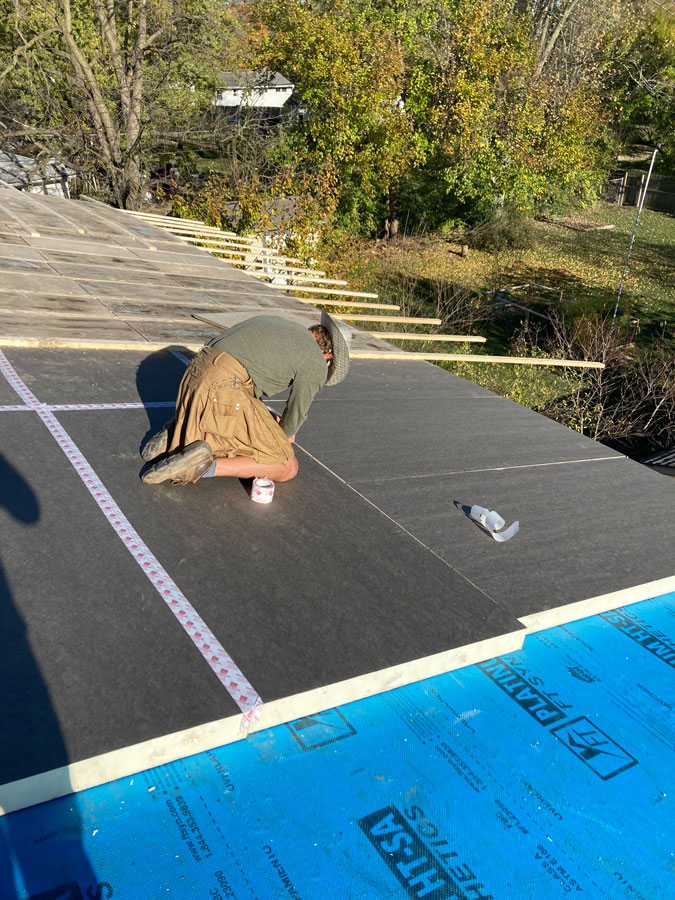
I Used Polyiso (Polyisocyanurate) for the Roof
Polyiso is another closed-cell rigid foam board, used for insulation. I bought a load of “factory seconds” 4” felt-faced polyiso for my roof deck. The imperfections in the “factory seconds” didn’t bother me, due to the additional insulation layers that were placed on top. (See installation details below.)
My Insulation is Outside of My Wall Sheathing
If you read my post about my framing details, you know that I have solid wood walls, rather than typical studs and sheathing. Instead of putting my insulation inside of the walls, I put it on the outside. This allows the entire structure to stay conditioned. And this leads me to my next benefit…
My Insulation is Continuous, Limiting Thermal Bridging
I previously mentioned the thermal bridging that happens in typical houses with stud walls. Because my foam is on the outside of my wall, I have the opportunity for a continuous “blanket” of insulation. This not only covers my walls, but also my roof and foundation.
My House Has a High R-value
R-value of XPS foam ranges anywhere from 3.75 to 5 per inch of thickness, depending on which product you select. So multiple layers of this stuff can provide a really nice blanket for the home. This R-value, in combination with my continuous air and water control layer and strong sheathing, will help retain extreme energy-efficiency.
How I Installed My Foam Insulation
The installation and layering of both the XPS foam and the polyiso makes a big difference in how well the home is insulated.
Installation of XPS Foam on Walls
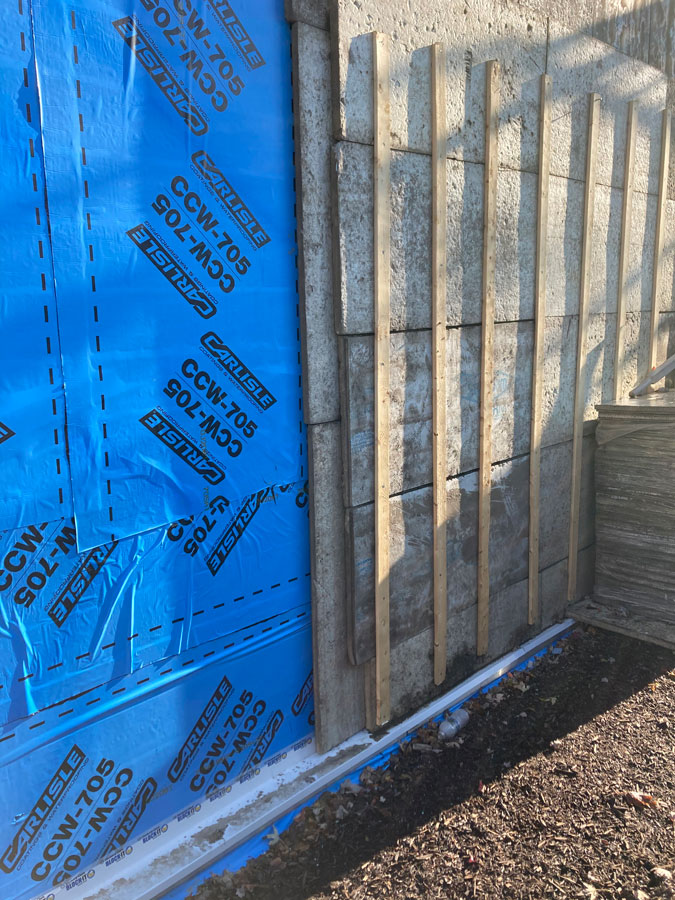
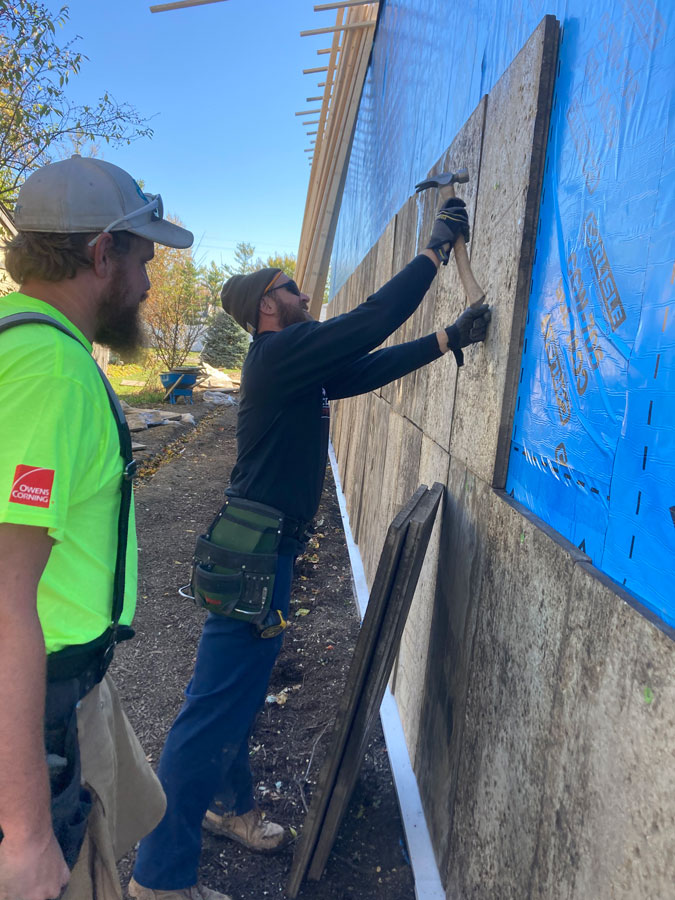
I used two layers of 1.5” thick XPS foam as the insulation for my walls and alternated the seams between the two layers. I was originally hoping to tape my seams for extra air tightness, but my recycled foam was pretty dirty and tape wasn’t sticking. Instead, I chose to use expanding foam in all of the cracks, to give me a more continuous layer.
I tacked the first layer of foam in with one 2” cap nail, just to hold it until I got to the second layer. Then after adding the second layer, I applied 1×3” furring strips for my rain screen, and also to hold the foam to the wall. The furring strips were fastened with 5” pole barn nails, which went right into my 1.5” tongue and groove wall sheathing. (See details on framing and wall sheathing here.) The nice thing about my continuous wall sheathing is that I didn’t have to hit studs or columns; I could nail the furring strips anywhere.
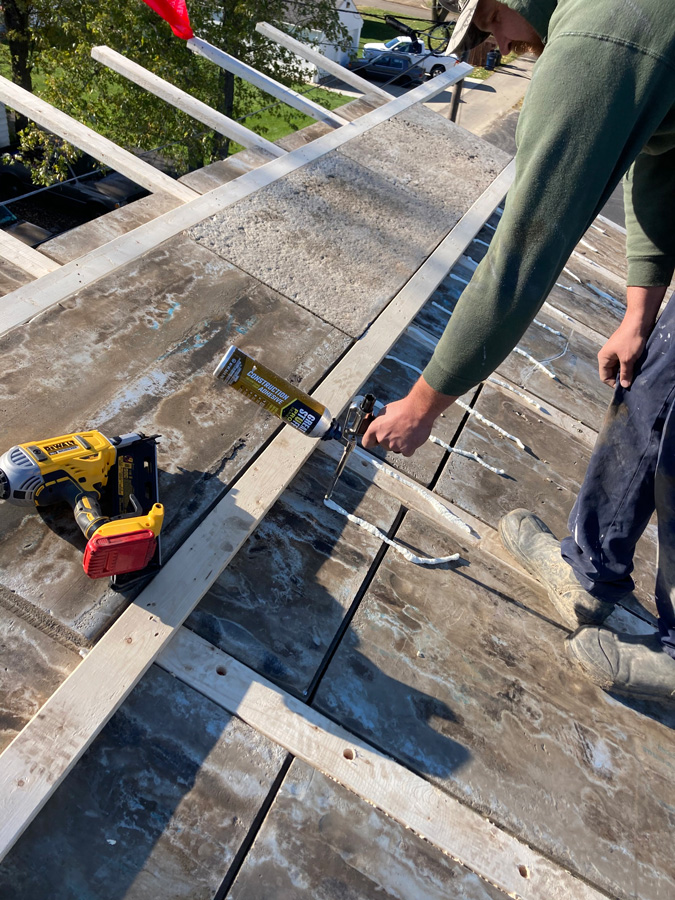
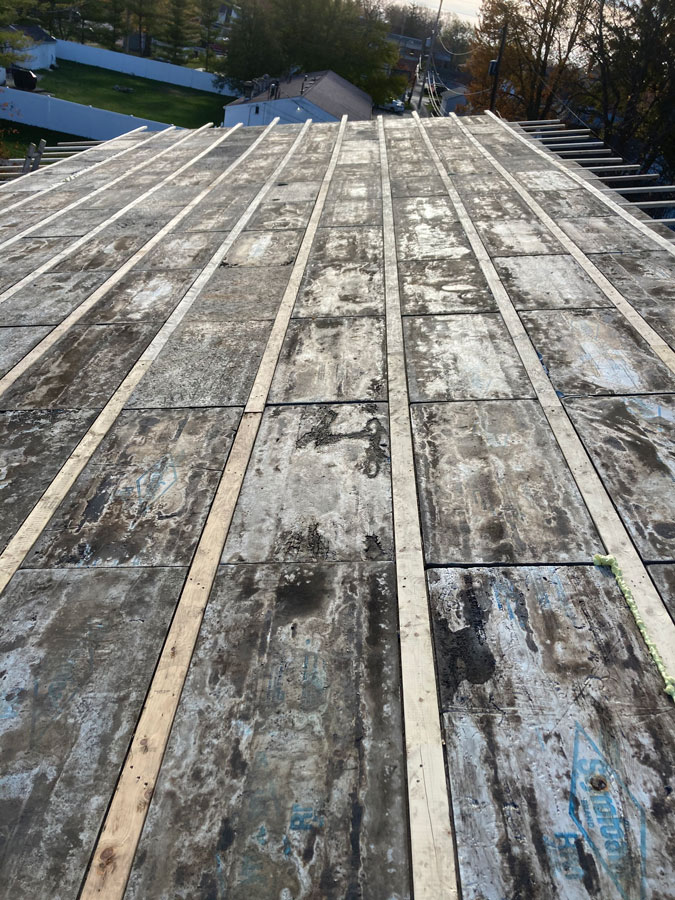
Installation of Polyiso on Roof
For the roof, I bought factory seconds 4” felt-faced poly iso. I put a continuous layer of that on my roof deck. I ran 2x4s vertically every 2 feet, and that gave me my caneliever on the front and the back of the house. I then put 1.5” XPS between all of the 2x4s.
On top of that, I ran my 2x4s every 2 feet horizontally, and that gave me my overhang on the sides. I put 1.5” XPS between each one of those as well.
Installation of Foam in Foundation
I put 2 layers of 1.5” XPS foam in my foundation. I staggered the direction of the foam tiles to ensure the seams were not aligned between the two layers. This not only helps with energy efficiency, but also prevents frost heave. Check out all of my foundation details in this post.
Insulation is One of the Most Important Details in Energy-efficient Building
If you’re aiming for energy efficiency, your insulation detail is one that you’ll want to spend some time researching. The key is having a continuous layer, and eliminating thermal bridging as much as possible.
Build on!
1 thought on “Using XPS Foam and Polyiso Insulation on My Energy-Efficient Home”