I want my home to stand the test of time. My non-traditional framing technique is one way I will ensure that happens. My framing details were designed not only for strength and durability, but also for energy-efficiency. Learn more about my framing detail, and why I chose this unique method.
When you think of framing a home, you often think of traditional stick framing. Or if you’re a little bit more progressive, you might consider advanced framing. If you know me at all, it probably won’t surprise you that I decided to ditch both of these methods and come up with my own. My framing technique is strong, durable, energy-efficient, uses real wood, and the only two studs in the whole house are these guys:
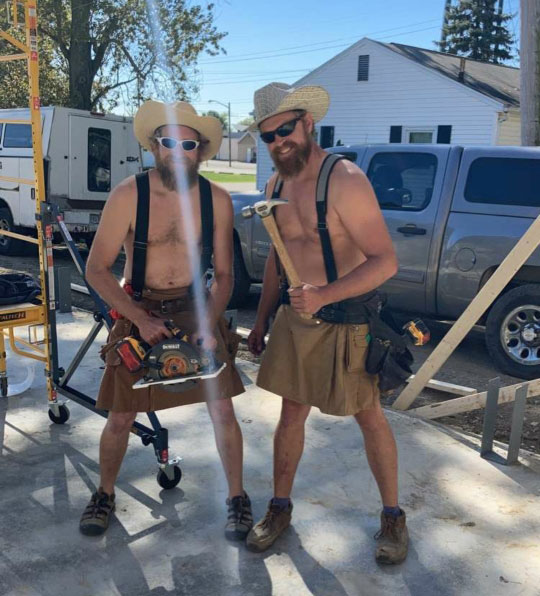
For those who don’t know me, that’s me and my brother, Brett, in the picture. We prefer to build in kilts.
Framing Details
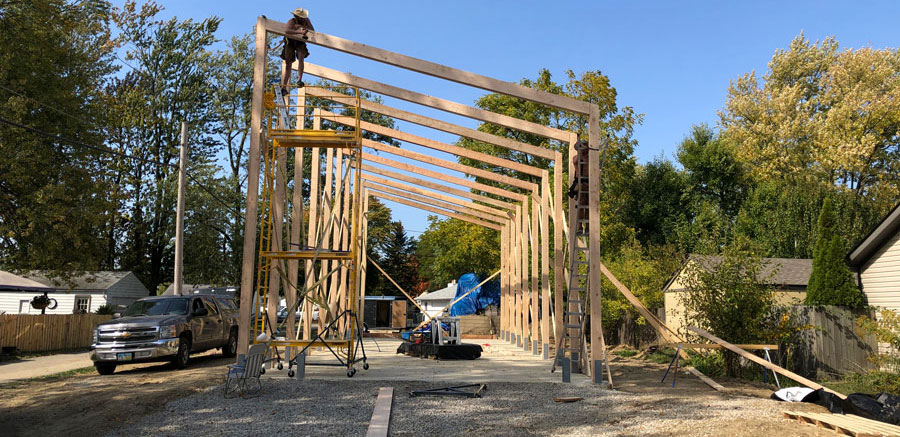
My framing detail is somewhat of a mix between a pole barn and a heavy timber post and beam style. My combination of columns and rafters allowed me to create a monolithic assembly (not to be confused with my monolithic slab). I then used tongue and groove spruce to create a strong outside sheathing. See all of the details below.
Structural Columns
My structural columns are made of laminated 4-ply 2x8s, and are spaced every 8’ apart. While most people would use a crane to lift these bad boys, my beastly buddy, Robert, walked them up himself. Check out this video:
(Remember earlier when I said there were only two studs in the house. I think we need to add this guy to the list.)
They were bolted into saddles, which were wet set into the foundation. Read more about my monolithic foundation here.
As you continue to follow through our building journey, you’ll see that these columns are actually visible from the inside. They don’t get covered by drywall. (Though we will be wrapping them with a smooth wood to appease my wife.)
Rafters
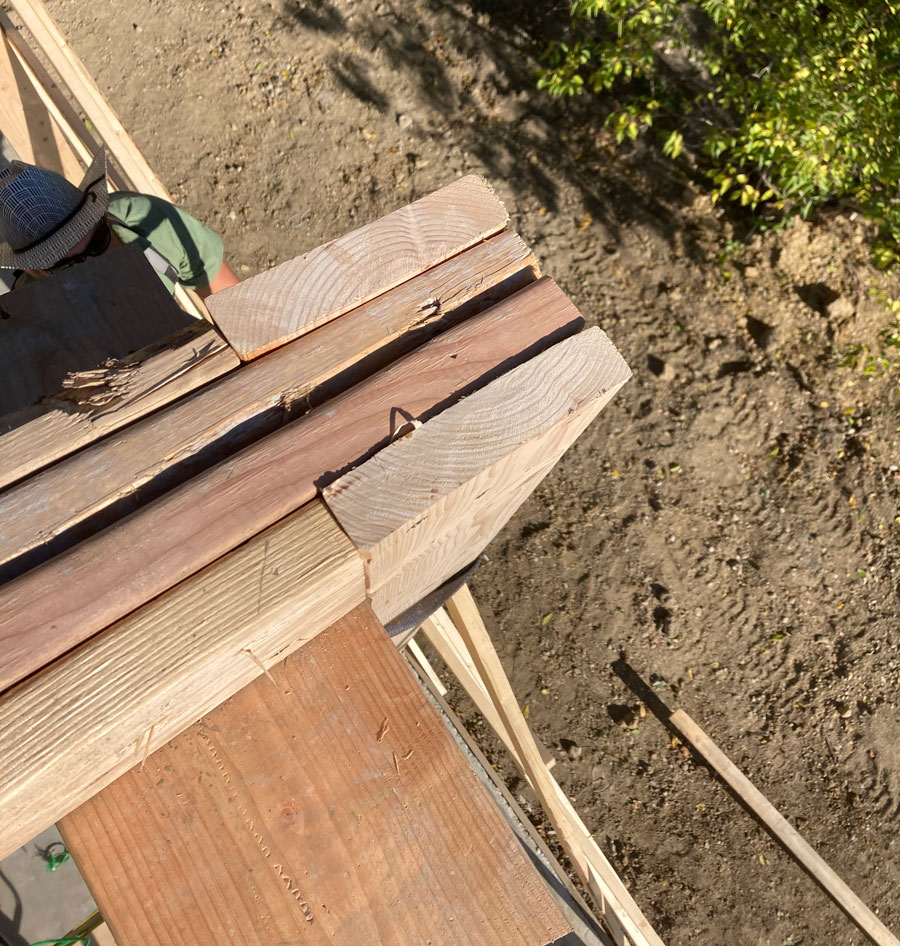
I used laminated 4-ply 2x10s for the rafters. When I built the columns, I left a pocket in the top for the rafter to slide into.
I made sure the pocket wasn’t too tight by putting a speed square in. (See pic below.) That way, when we were up on the scaffold, we didn’t have to fight it, and the rafter slid right in.
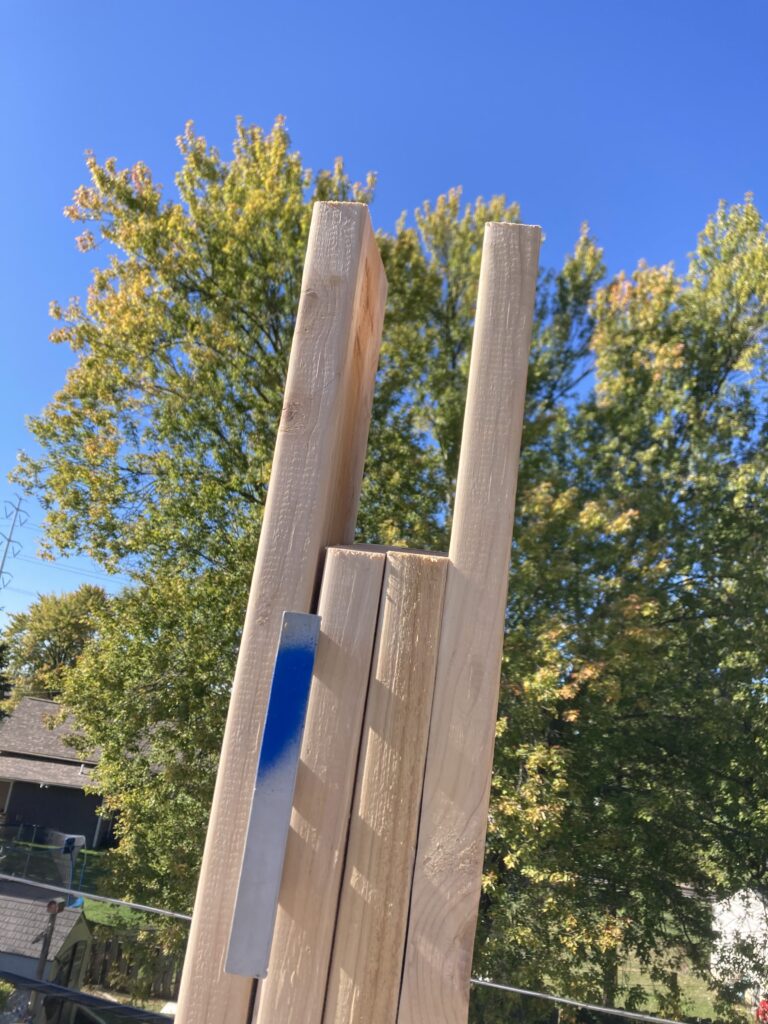
Once the rafter had slid in, we pulled the speed square out, and tightened everything together with 5.5” GRKs (structural screws).
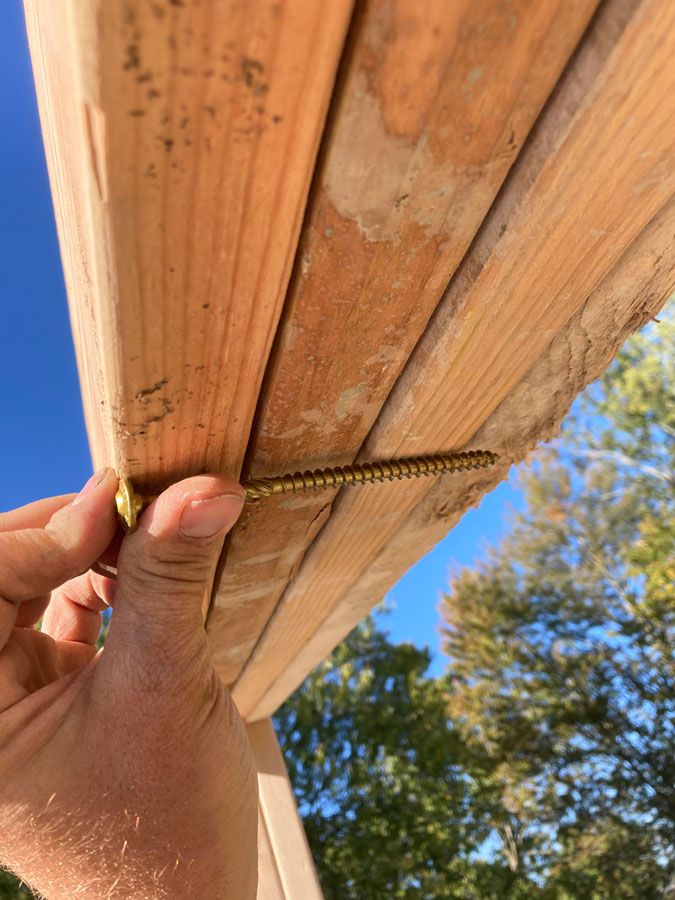
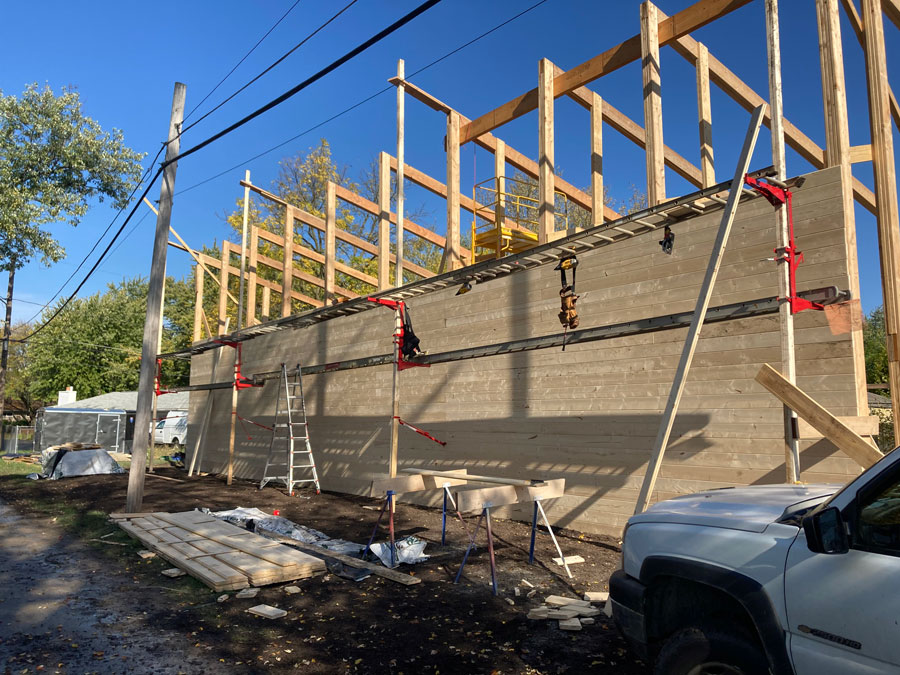
Outside Sheathing
Instead of traditional OSB sheathing, I used 2×8 tongue and groove spruce boards as my outside sheathing. The boards are 16’ long, and I offset the seams for superior shear strength.
People’s first comment when they hear about my sheathing is generally, “Wow, isn’t that expensive?!” While the tongue and groove does cost significantly more than OSB, it also acts as the finished wall on the inside of the home. I saved on cost of drywall, studs, top plates, bottom plates, cripples, headers and labor. When I compared the cost between the traditional method and my method, there wasn’t a significant difference. (But there’s a huge difference in quality! Read on to learn more.)
As a side note… and to add a little wrinkle to the cost equation… there has been a crazy price increase on tongue and groove lately (as well as many other building materials).
- Pricing per board when I quoted in March: $19
- Pricing per board when I bought it in September: $38
- Pricing per board as of today: $47
(Just another reason why I love COVID-19…)
Other Framing Details
There are a few additional details that I’d like to call out:
- I went with a 3/12 single pitch roof. This allows me to achieve superior air sealing, and it also gives us the modern front facade that we were looking for in our design.
- If the pictures have you concerned that we will have a windowless house, fear not! (We actually have some big windows coming.) While you typically frame around the windows and leave openings, I plan to cut them out later. The window delivery is delayed (thanks again, COVID), and I wanted to take advantage of knocking out framing quickly with the nice weather we are having.
- We have no “was wood” (OSB, MDF). Sawdust is the byproduct of working – not a building product!
- I mentioned that the framing is studless. The entire structure and bones of the house (everything talked about in this post) are studless. That said, I will use studs for the interior partition walls when that time comes.
Sawdust is the byproduct of working – not a building product!
Why Did I Choose This Framing Technique?
There are two primary reasons for my framing detail – energy-efficiency and durability. (Are you recognizing a common theme with this house?)
Energy-Efficient Framing
A typical stick-framed house has 2x4s or 2x6s every 16” on center. The cavity between the studs is what gets insulated. That allows for a lot of thermal bridging. (Insulation R value might be R13, and the stud R value is R3.) This is too much wasted energy for me! My framing design eliminates all thermal bridging, and allows me to insulate the entire wall assembly from the outside. There is very little air leaving my house – and it’s mostly the air that I am sending out purposefully through my HRV system. (More to come in future posts.)
Quality Framing Lasts a Lifetime (or a Bunch of Lifetimes)
If there is a natural disaster that hits our area, my house will be the last one standing. It has extremely strong solid wood walls. As another perk, this framing is treated like a grand piano. It is all conditioned, meaning it’s not getting cold and hot as the weather changes. It is protected and will last forever.
Is This Framing Technique Right For Your Home?
If you’re planning to build a home and wondering if this technique is right for you, ask yourself these questions:
- Do I value quality over cost?
- Is energy efficiency important to me?
- Am I willing to find the right builder who is willing to stray from the “norm”, and is confident in this technique?
- Do I like the style of having wood walls and columns exposed on the interior of the home? (It can be painted or stained.)
Most importantly, make sure you are making the best decision to meet the goals of your home. Don’t let “the way it is always done” keep you from chasing what you really want.
Thanks for following along my journey.
Build on!
1 thought on “My Unique Framing Technique: Energy-efficient, Strong and Studless”