One extremely important detail on my new home is the water and air control layer. It is continuous around the entire house, from the foundation to the roof. I plan to have very little air infiltration, which means cleaner healthier air, lower heating and cooling bills, no bugs and a more durable structure.
As I’ve been driving around lately, I’ve been past a handful of construction sites, only to see their mechanically-fastened barrier flapping in the wind. Is that the quality material that you want protecting your home and family?
Not to keep ragging on the traditional water and air barriers, but in my experience remodeling homes, I have seen these mechanically-fastened paper products deteriorate. Control of water and air is too important to take lightly or “cheap out” on. It will only cost you more in your monthly bills, and will end up causing long-term destruction of your home.
Why is a Continuous Water and Air Layer So Important to My Design?
It is difficult to get a continuous barrier around an entire home, and it requires a more premium product, so people generally don’t do it. That said, I knew it was critical to include in my design for two reasons: air quality and energy-efficiency.
My Water and Air Barrier Ensures Health of My Home
The air we breathe is a pretty big deal. Yet for some reason, the American population doesn’t seem to care much about it. There is a shift towards healthier foods and drinks, but what about the air we breathe? How often, when people are looking for new homes, do they consider the consequence of that home on their health? Would you rather have good indoor air quality or a new granite countertop?
Think of the condensation on a cold beer on a hot day. (Mmmmm…) Those hot, humid days have the potential to cause havoc on conditioned homes. Air travels from warm to cold. A small air leak on a building enclosure will allow the moist air to travel inside your home and condense on a cold surface. Water and standard building materials do not play well together. OSB sheathing will quickly swell, but dry out very slowly. When the OSB becomes saturated for too long, you get bugs, mold and rot!
Another huge advantage of a continuous air and water barrier is better sleep. I have been woken up with a yelp from my wife to kill a spider one too many times! The system I used in my house will inhibit those termites, spiders and ants that like to make their way into our homes as it starts to get cold out. Because my home is air tight, I am not sucking air out of a dusty attic, damp crawl space or fiberglass-filled wall cavities. The only dirt and dust getting into my house is what my boy and I drag in with us.
My Water and Air Barrier Offers Ultimate Energy-Efficiency
Did you know that a seemingly-small ⅛” crack between your sill plate and foundation could equate to the size of a basketball-sized hole? How often did you get in trouble as a kid for leaving the door open for too long? I grew up in a hundred-year-old farmhouse. It was an aged piece of swiss cheese in regards to air sealing. We very easily could have had “a door open” all the time in regards to air loss. Think of how much heat and air conditioning it takes to make up for that! I want to keep all of the inside air inside, and the outside air outside.
At this point, you might be wondering how the house is going to breathe. Trust me, I have had a lot of people inform me of my house being “too tight”. First off, people need to breathe, not houses. That said, there is definitely such a thing as being too tight. I plan on using an HRV system to ventilate on my own terms with conditioned, filtered air from the outside. (Future post coming with more details on this.)
Materials Used for My Water and Air Control Layer
Material selection for my barrier was extremely important, and took a lot of research. Learn more about what I used for the walls and roof.
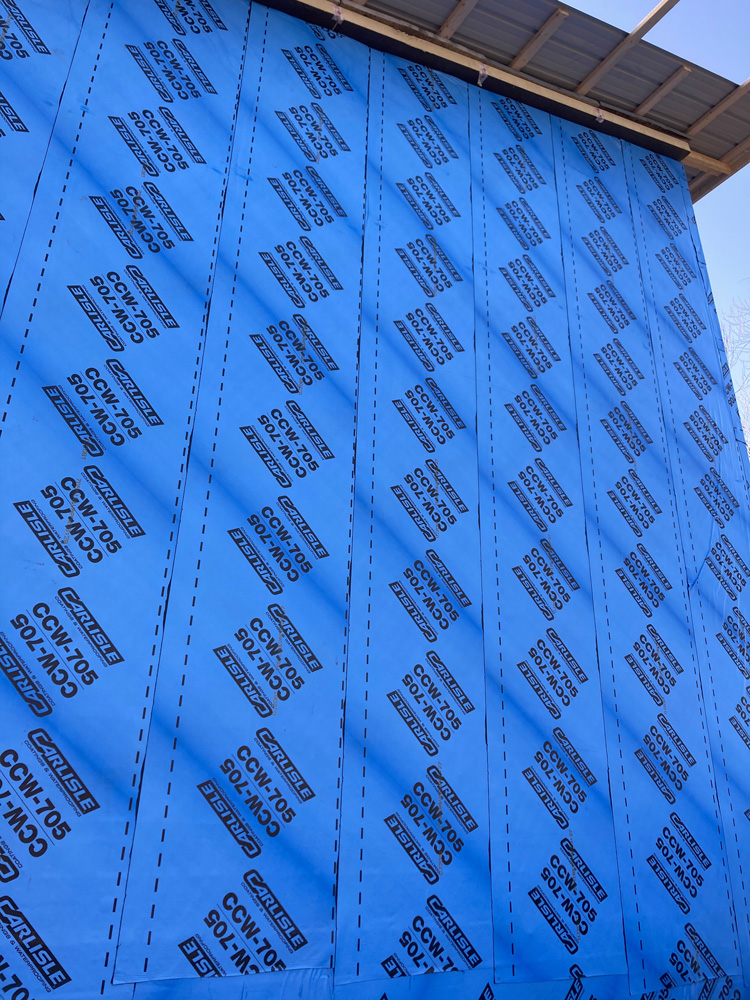
Carlisle CCW-705 Membrane for the Walls
I knew I wanted to use a fully-adhered membrane because my insulation was going on the outside of that. It won’t be easy to access later, so it was important to get it right on the first shot. (I plan on never replacing this stuff!)
I also wanted something that was vapor impermeable. I used Joe Lstiburek’s perfect wall assembly design in my home, so my walls do not require a vapor permeable membrane.
After narrowing down to Carlisle and Henry Blueskin, I chose Carlisle, simply due to the availability at my local building supply store.
A few specs of the Carlisle CCW-705:
- 40-mil-thick membrane
- This allows any nails and screws to be sealed with the membrane
- Non-permeable
- Made of a cross-laminated HDPE film fully coated with polymer-modified asphalt adhesive
- Simple peel-and-stick application
- Can be installed in just about any season without the use of special tools or equipment
Get all of the details on the Carlisle website.
Carlisle CCW-702 Primer for the Walls
Prior to adhering the CCW-705, I applied the Carlisle CCW-702 primer. CCW-702 is specifically designed to enhance adhesion of Carlisle CCW membranes.
A few features of the CCW-702:
- Quick-drying
- Solvent-based
- High-tack adhesive
Get all of the details on the Carlisle website.
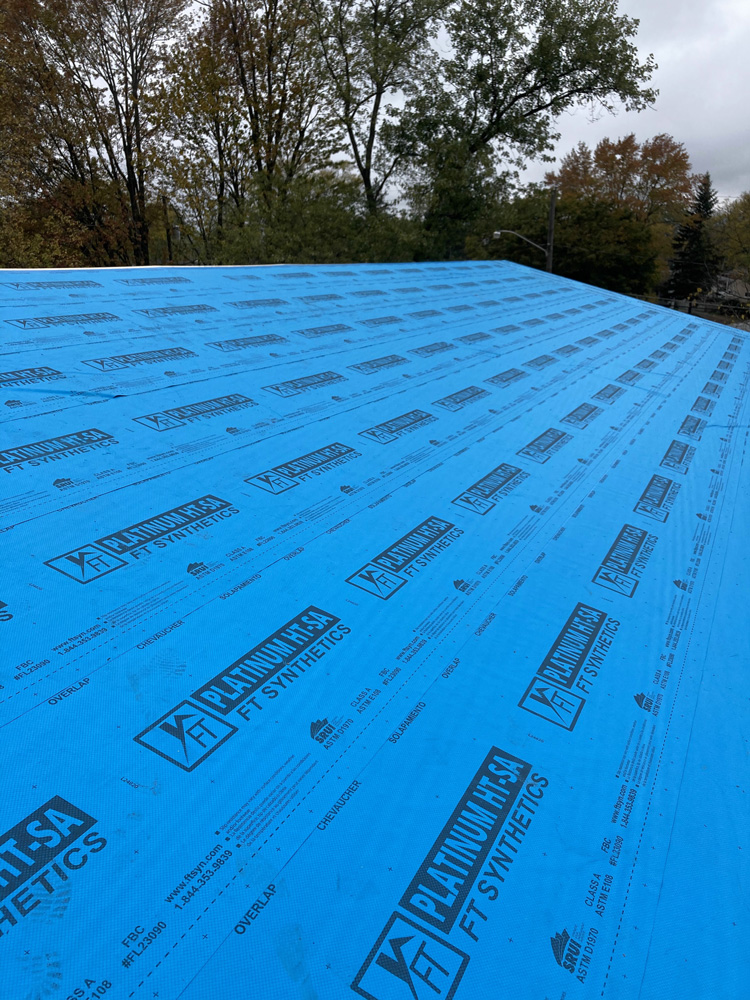
FT Platinum HT-SA Synthetic Underlayment for the Roof
I chose to use the Platinum HT-SA from FT Synthetics as my barrier on the roof. Straight from their website: It is designed for sloped roof applications to help protect against water infiltration from ice dams and wind driven rain.
Platinum HT-SA features:
- High temperature resistant to 260°F
- 180 day UV resistant
- Synthetic construction to inhibit mold growth
- Lifetime limited warranty
Get all of the details on the FT Synthetics website.
Installation of my Water and Air Control Layer
It took a few day’s work for a few hard-working guys to get the membrane installed, but I’m very happy with the final product. I had an extra large crew come out one Saturday to help. Here’s evidence that I didn’t work them too hard:

Step 1: Apply Carlisle CCW-702 Primer
As I mentioned above, I used Carlisle CCW-702 primer to provide maximum adhesion of my membrane. It applied easily with a ⅜” nap roller, and dried within about 20 minutes on our warm, breezy days. This stuff has some tenacious holding power. When the membrane was stuck onto it, it was STUCK.

Step 2: Stick Carlisle CCW-705 Membrane
After the primer was set, we applied the real hero – the Carlisle CCW-705 membrane. This stuff is self-adhesive, so we just had to peel off the back and apply it like a huge sticker.
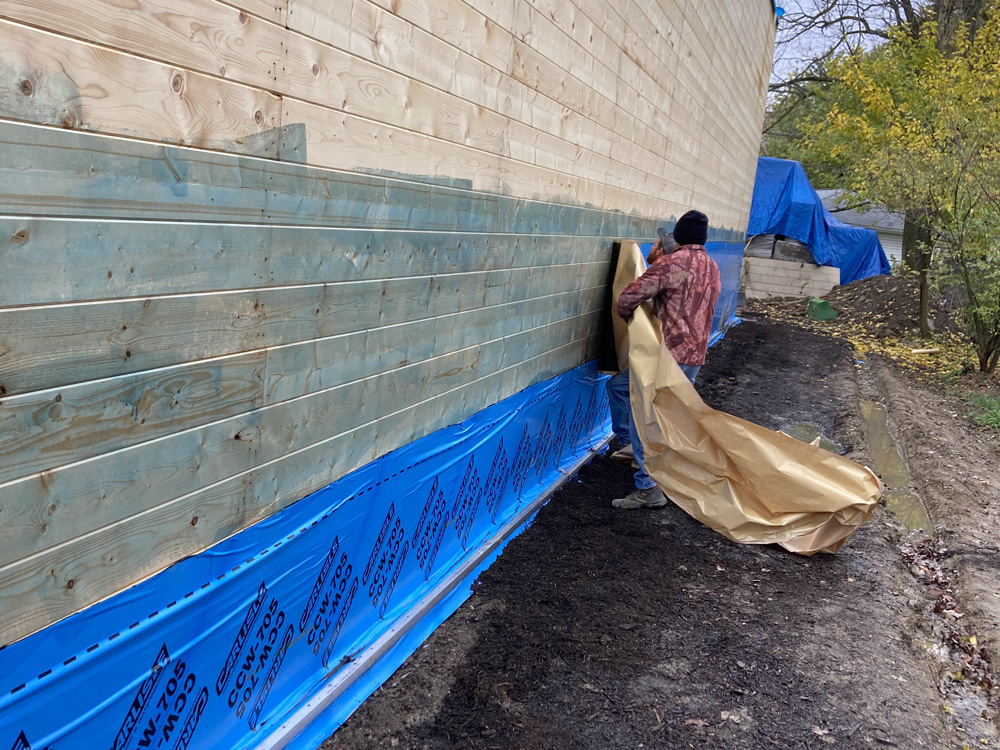
We ran the first two rows from the bottom horizontally. The first row only went up the wall 28” because we left extra space at the bottom to drape over the foundation insulation, and over the 2×8 foundation edge. (See more details about my monolithic foundation here.)
We had trouble applying it without any wrinkles because it was in such large sheets. I didn’t want to have a bunch of seams, so we decided to run them vertically (top to bottom) after the first two rows. (Typically, I would want to start at the bottom and overlap in a shingled fashion, but I felt that it was sealing up so well that it wasn’t necessary. I wasn’t worried so much about water as I was focused on air and vapor.) We overlapped each piece 4”, too, so that helped ensure a tight seal.
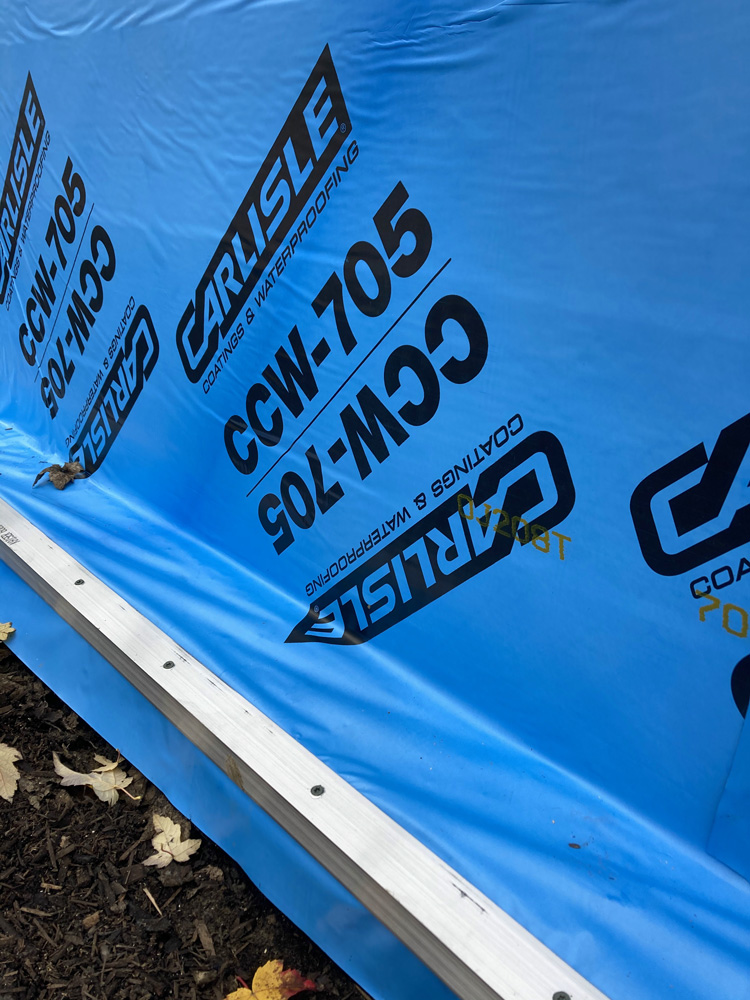
Step 3: Apply Carlisle Water Cut-off Mastic
It’s important that my barrier layer is continuous around the entire home, so having a good bond between my wall barrier and my foundation barrier is key. That’s where the Carlisle Sure-seal Water Cut-off Mastic comes in. At the bottom of the wall, I applied a thick bead of mastic around the treated 2×8, and on top of the 6mil plastic that is under my slab.
To ensure an even tighter seal, I got 1.5” aluminum angle in 20’ pieces that I screwed into the 2×8 with coated deck screws. This ensured a good, solid connection between the plastic in the slab to the air barrier on the walls. There won’t be any bugs getting into this house!
Step 4: Install Platinum HT-SA Synthetic Underlayment on Roof
My roof is a 3/12 single pitch. (Read more about my framing details here.) I applied FT Platinum HT-SA peel-and-stick underlayment on the entire roof. At the high point of the roof, I brought my Carlisle 705 membrane from my walls over top of the roof membrane. At the low point of the roof, I overlapped my Platinum HT-SA on top of the Carlisle. I feel confident that I got a good seal.
Unique Installation Detail
There are a couple of details of my installation that might have you scratching your head – especially when compared to a typical home build.
- Most typical home builds have rafters extended out when they frame for soffits. That didn’t work in my design, because it would make it extremely difficult to have a continuous water and air control layer. I will have 3’ soffits and overhangs, but I will be adding that later so that I can keep a good seal.
- Typically, windows are cut out before the WRB is applied. Since my membrane is fully adhered, I am going to cut my windows after the fact. (Thanks to COVID, I don’t have my windows yet, so I didn’t have much choice here, unless I wanted to sit around and wait.) I will use a Prosoco (liquid flashing) for my window detail. More to come in future posts!
A Continuous Water and Air Control Layer is Designed for the Long Haul
Having a continuous water and air control layer isn’t something you just decide to slap onto your home. It has to be factored into the design from the start. That said, it has long-lasting benefits! It’s durable, helps reduce energy bills, prevents bugs and dust from entering, and allows you to breathe clean, healthy air.
Stay tuned next week to hear more about my insulation (one of my favorite details)!
Build on!
I have been very interested in your home as I walk by it at least once a week. I appreciate finding this blog and will continue to follow along (as well as walk by).
Hi Kathy! Thanks for the comment. Feel free to stop in anytime. Happy to show you around!
Hi, Craig:
I’d love to see your home. I’m on Hilliard City Council and would love to see more energy efficient, out of the box homes.
Thank you,
Cynthia
Awesome! We’d love for you to come to the open house when it’s done!