Learn about the benefits of a monolithic slab over a traditional concrete foundation, and see how I implemented this in my energy-efficient home.
It has been a while since you heard from me. Turns out building a house takes a lot of time and energy. That said, I promised to take you along my energy-efficient home-building journey, so sharing about my foundation seems like a good place to start. If you know anything about me or the home I’m building, you’ll know that it’s not exactly traditional. Well my slab detail is no exception.
What is a Monolithic Slab?
A monolithic slab is a concrete foundation that is completed in one pour. In my design, the concrete is 12” thick around the perimeter to support the load-bearing walls with a 4” thick slab in the middle. Traditional foundations, often referred to as stem-wall, typically take 3 pours – the footing, foundation walls and then slab. Monolithic slabs combine those all into one piece, and act as part of the structure of the house.
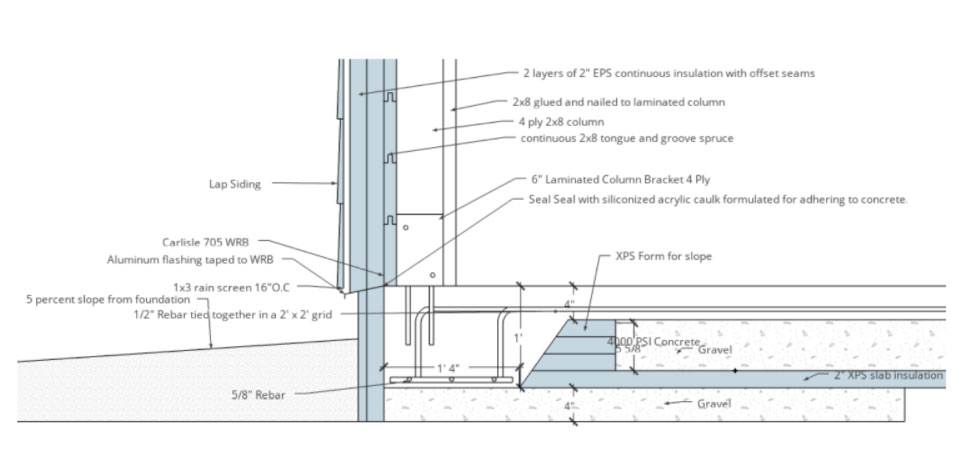
For those nerdy building science guys and gals (like me), here is a detailed diagram of my foundation:
Why Choose a Monolithic Slab?
While there’s nothing wrong with a traditional stem-wall foundation, there are a number of reasons why I chose to move forward with a monolithic slab.
My Monolithic Slab is Well-Insulated and Helps with Energy Efficiency
If you know anything about my new home build, you know that energy efficiency is at the core of every decision I make. The monolithic design allowed me to put 2 layers of 1.5” XPS foam in the slab. I plan on utilizing the slab as a thermal mass to hold heat on sunshiny days, so having that insulation is important. I was also able to maintain a continuous air barrier from the slab to the exterior walls.
I Saved Tons of Money on My Monolithic Slab
If someone told you that you could save $20,000 on your foundation without sacrificing quality or durability, would you do it? (Of course!) Because I don’t have a basement (a blog post for another day) and I didn’t have to dig footers, my excavation was a breeze. I also saved money by not having to buy block, only having to pay for one concrete pour, and significantly reducing labor costs.
Monolithic Slabs Are Quick to Implement
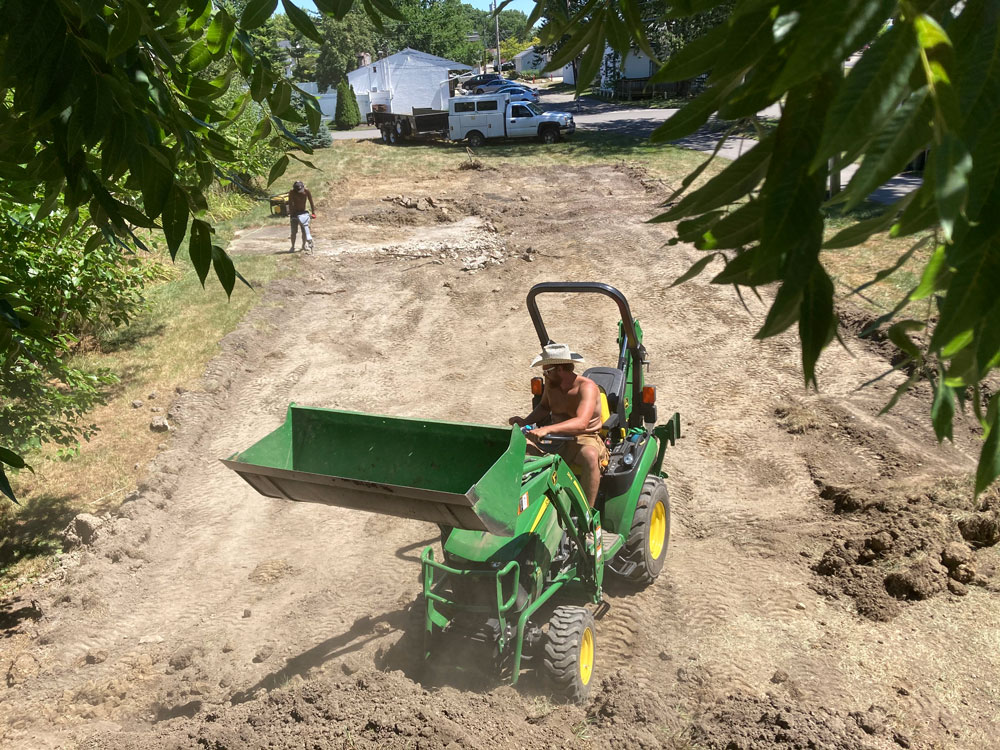
We got the entire foundation prepped, poured and cut within a week. For the simple excavation process, my brother brought over his handy garden tractor and did all of the ground prep work in 2 days.
Only having 1 concrete pour, rather than 3, also saved us a significant amount of time. Anyone who has ever built a house knows that time is money. Every minute we saved in the foundation process was a minute earlier that we could start framing.
Are There Downfalls to Monolithic Slabs?
When the building inspector looked at my slab, he admitted he had never seen anything like it. They are not common – especially in colder climates. (Gotta love Ohio winters!) Here are some of the reasons that people shy away from monolithic slabs:
- If your ground is not even, a monolithic slab is not a great option. Too much concrete is required to compensate for the slope of the ground.
- If your home needs to be built high off the ground due to being in a flood zone, a monolithic slab doesn’t allow for this elevation.
- If you think you “need” a basement, this foundation will not work for you, because you need foundation walls.
- Freeze heave occurs when ice forms underneath the soil. The freezing and thawing of the ground can cause cracks and structural issues in your foundation. For this reason, there is a misconception that all foundation walls must sit below the frost line, which is 32” underground here in Ohio. (This is how typical stem-wall foundations are constructed.) What many people don’t realize is that proper insulation techniques on a monolithic slab can protect the foundation from frost, eliminating the risk of freeze heave.
- People like to do things the traditional way. It’s easy and comfortable. A stem-wall foundation is far more common than monolithic.
Details of My Monolithic Slab Construction
While I’ve bragged on the ease and simplicity of my monolithic slab, it was still a detailed process. Here is the basic breakdown of the steps:
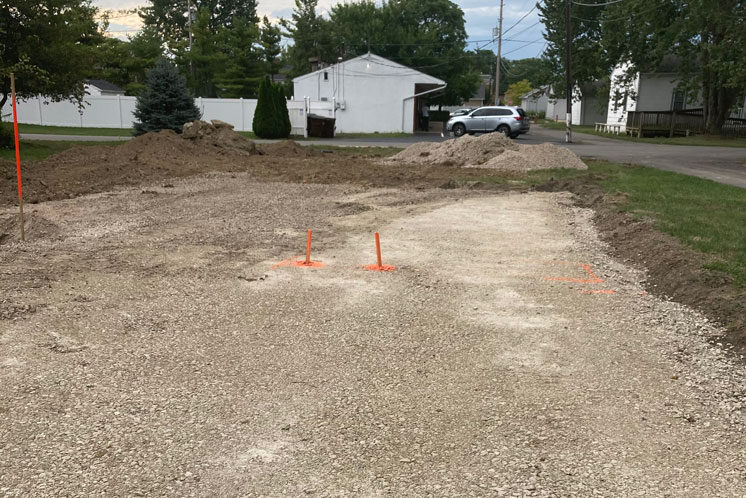
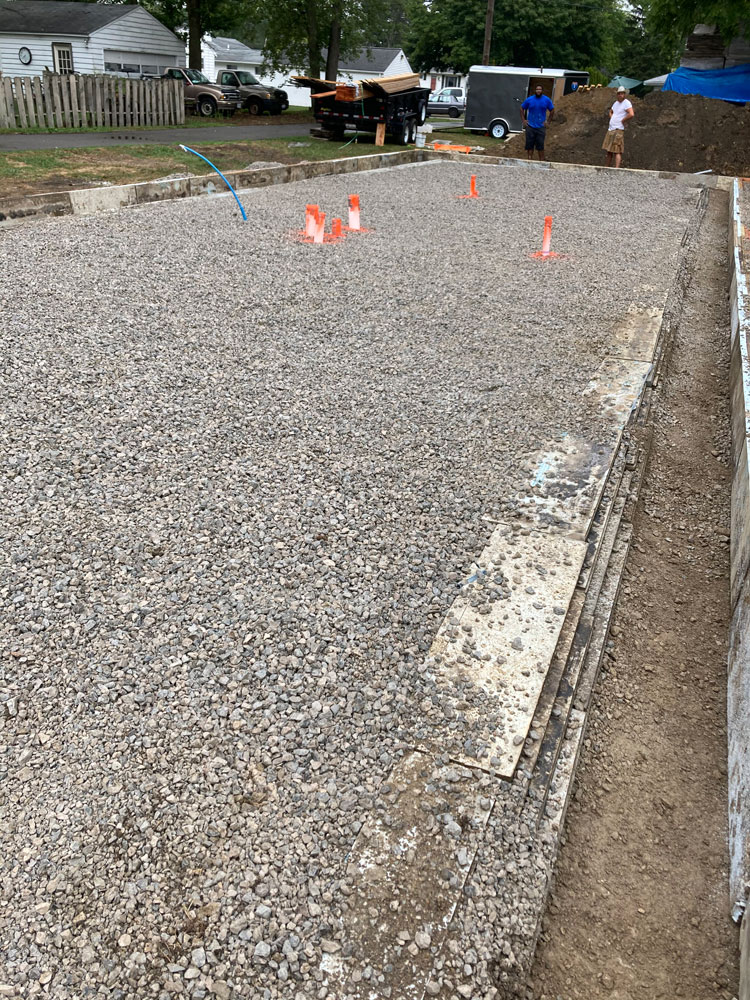
Step 1: Excavation
As I mentioned above, we were able to complete the entire home excavation with a small garden tractor. We first stripped the existing topsoil. We then spread 3” of #57 gravel, and 3” of #304 gravel, which we compacted with a plate compactor.
Step 2: Foam Insulation
To protect from frost heave, and to add energy-efficiency, I put down 2 layers of 1.5” XPS foam. I staggered the direction of the foam tiles to prevent seams from aligning between the two layers. The entire slab has 2 layers of XPS, except for the 16 inches inside of the perimeter. This 16 inch space was used to build up concrete thickness for my grade beam.
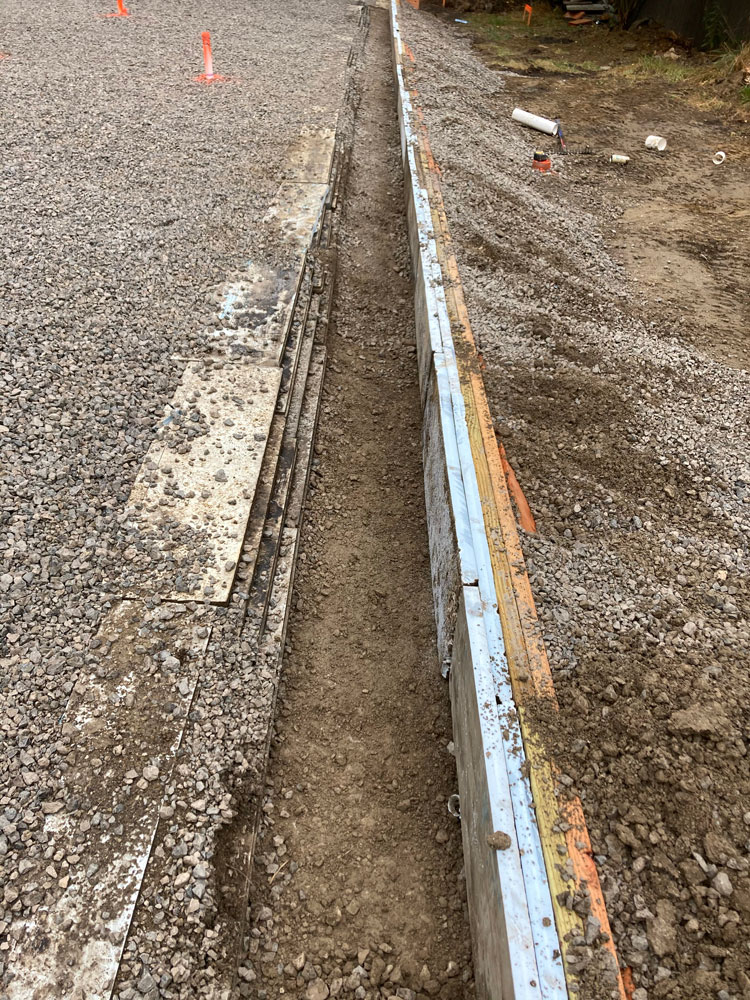
Step 3: Gravel
I then laid 5″ of #57 gravel above the foam for added thermal mass, and to get the height needed in the perimeter. I made forms out of XPS foam around the perimeter to stop the gravel from sliding into the perimeter.
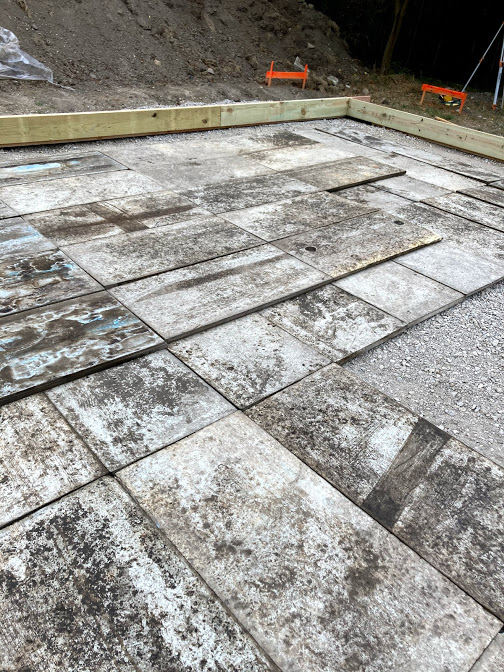
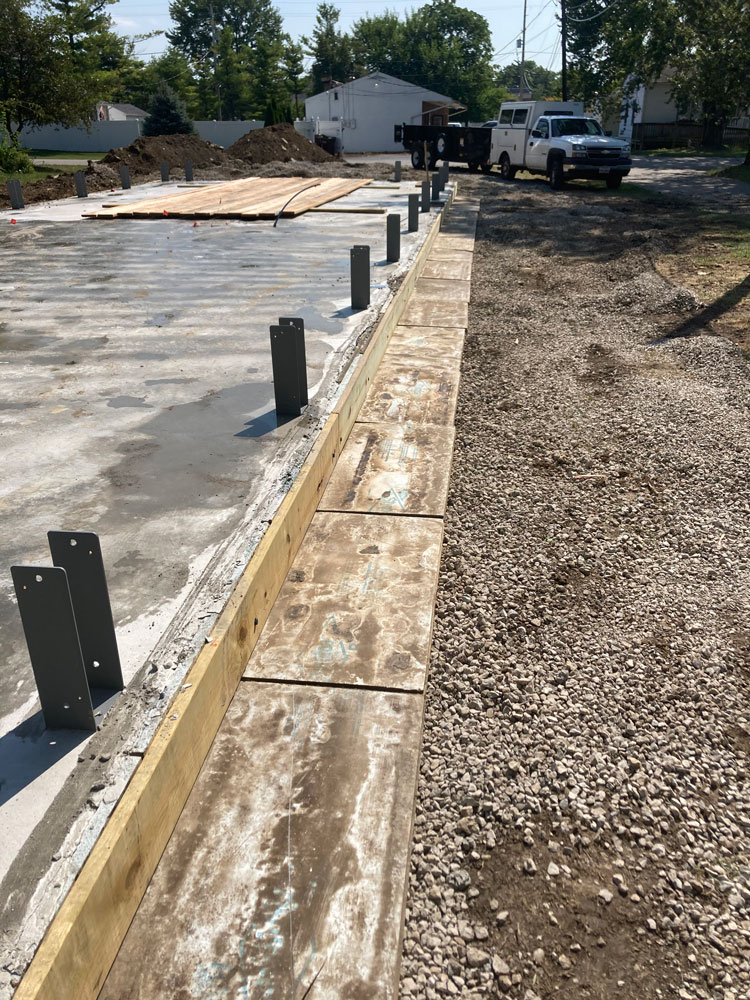
Step 4: Perimeter Insulation
More foam insulation! I added 2 layers of 1.5” XPS foam to the outside perimeter of the foundation. (This eventually got covered up with dirt.) The two layers of the perimeter vertical foam was embedded in the gravel a few inches, and supported at the top with a treated 2×10 form board that will remain after the house is completed. This board will protect the foam.
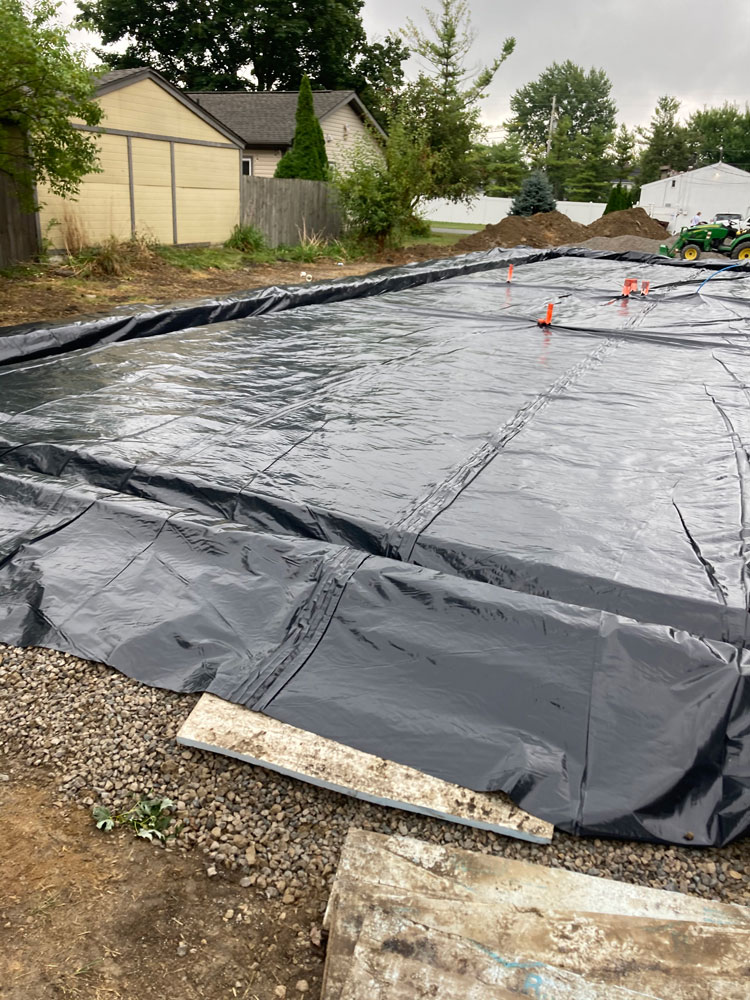
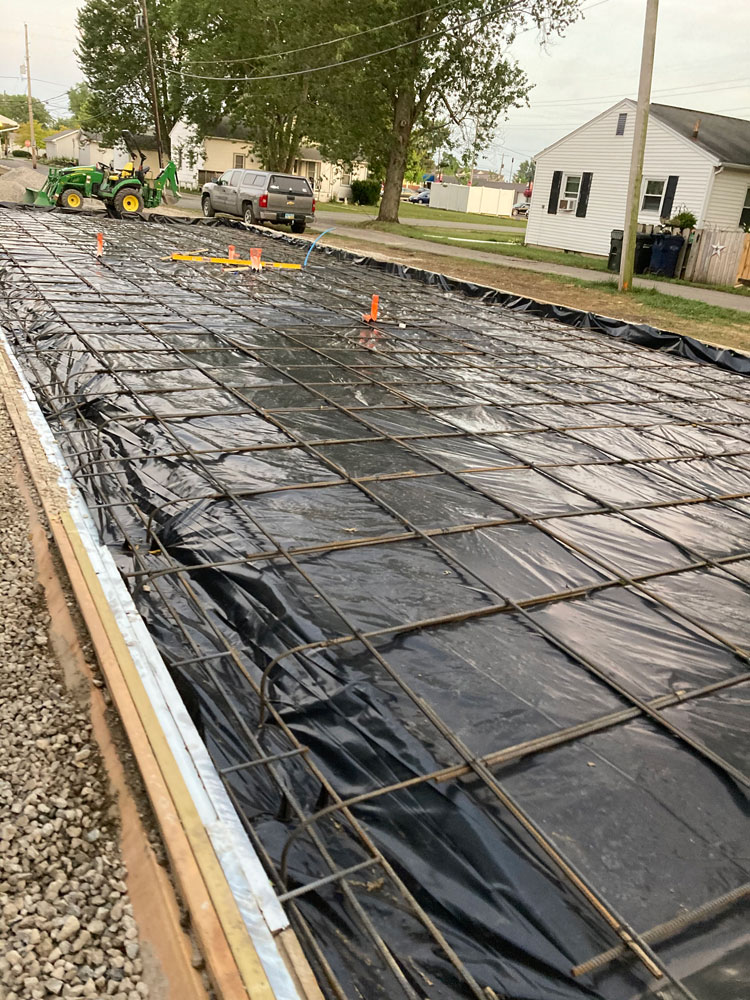
Step 5: Vapor Barrier
I added a 6 mil plastic continuous vapor barrier. Concrete is porous, so this barrier will keep moisture from getting into the concrete from the ground. In many instances, people will use multiple pieces of vapor barrier and tape it together. I was fortunate to be able to get one continuous sheet to ensure even better protection.
Step 6: Rebar
I used all ⅝” rebar for the concrete. The thickened perimeter foundation is tied into the slab with a continuous rebar, bent with a rebar bender and my brother’s shear strength. I laid the rebar in a 2’x2’ grid, and tied all of the steel together for a continuous monolithic unit.
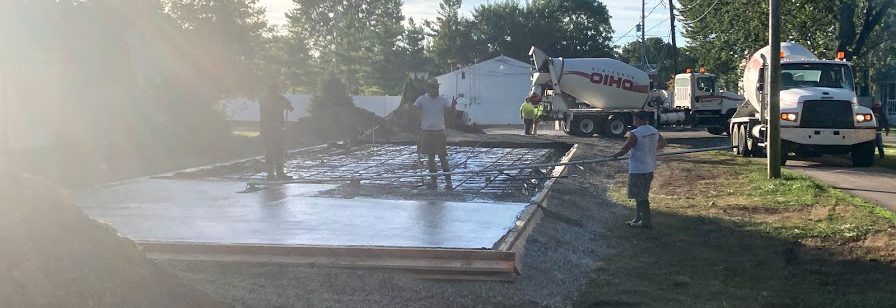
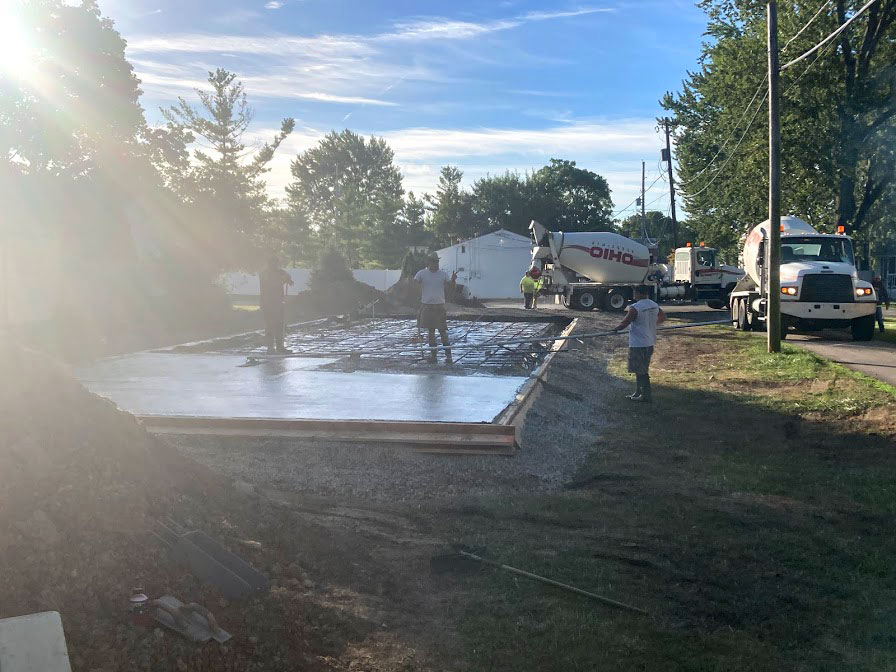
Step 7: Pour Concrete
We poured 45 yards of 4,000 PSI concrete.
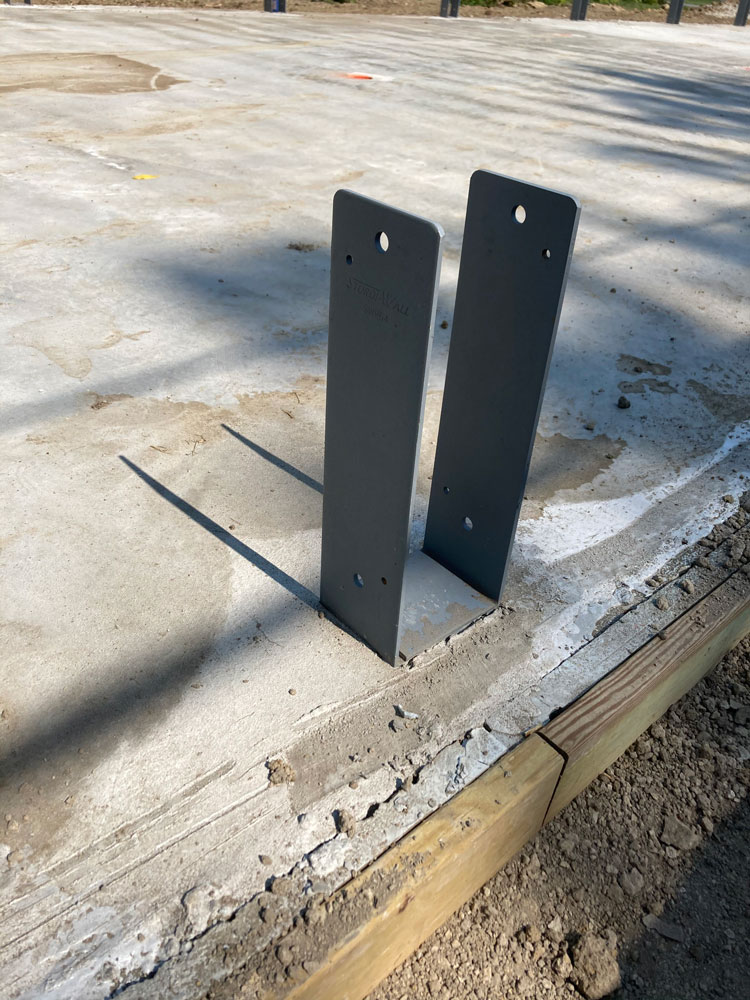
Step 8: Structural Saddles
As a bomber foundation detail, we wet set the saddles for my structural columns before the concrete dried. This provides a very strong foundation-to-wall connection, offering exceptional shear strength. This enhanced shear strength was especially important to me because of our 12’ x 16’ grid of south facing windows.
Step 9: Horizontal Wing Insulation
Finally, I added 1 layer of 1.5″ XPS foam that extends out 2′ from the bottom edge of the foundation. It helps retain heat to prevent freeze heave.
Partners and Products
I always like to give a shoutout when I come across great products and trustworthy local companies. Check out my material and subcontractor details below.
- Foam Insulation
- Purchased from Insulation Depot
- Details: 1.5” XPS recycled foam. It was pulled off of an old commercial building in Georgia, and I saved it from going to a landfill. (It also saved me thousands of dollars from buying new!)
- Concrete
- Supplied by Ohio Ready Mix
- Details: 45 yards of a 4,000 PSI mix
- Recycled Concrete (for gravel)
- Purchased from Frank Road Recycling
- Details: #304. Recycled is always the way to go, when you can!
Considering a Monolithic Slab?
Don’t be scared to stray from the traditional! Do your research, check out your local building codes and then be confident in your decision.
Have questions? Found this article helpful? Leave me a comment!
Build on!
Fascinating……this article has sold me. Building three ICF houses in Lancaster Ohio and I am going to go this route. Mind any extra questions?
Sorry, I have been away from the blog for a while. I would be happy to talk if you would still like