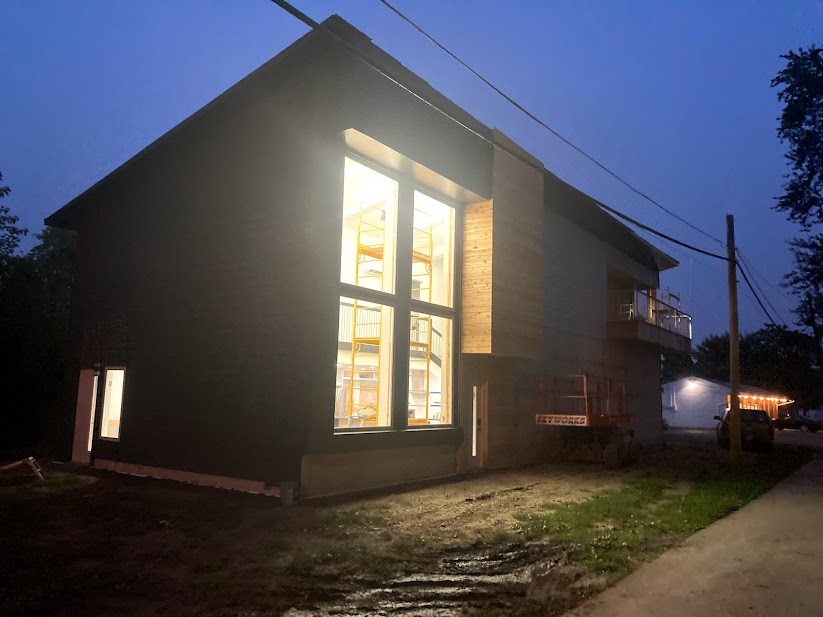
Windows add immense value to a property. If installed correctly, the occupants enjoy natural light, views of mother nature, and controlled ventilation. But if the window is installed incorrectly, the occupant will endure increased energy consumption, uncomfortable drafty conditions, and premature wall failure. Windows are an essential element to every building and the installation is just as critical.
Window Placement and Quantity
The window is the worst part of any thermal envelope. The R value of a window is nothing compared to that of a well designed wall assembly. Therefore the placement and quantity of the windows should be carefully thought out. Every window should be designed for its room, direction, and function. For example: South facing windows in my climate allow the most solar heat gain in the winter months. All winter, my family has been able to bathe in the warm sunshine in the living room on a sunny day. We get free heat (as long as the sun is shining here in Ohio). The north facing windows on my house provide ventilation and a source of egress in my bedrooms. I was very conscious in my design not to add any extra unnecessary windows. Windows are not only energy hogs but are a large part of a building’s budget.
Why Does Proper Window Installation Matter?
You’ve probably heard the phrase. “There are two types of windows: ones that leak, and ones that will leak.” I do not manufacture windows, but I have seen many rotted wall assemblies due to window installation. I was a part of a simple window trim project here in Columbus. After removing the casing around the windows in the living room, we found rot. Lots of rot! The windows were trimmed with a synthetic stucco on the exterior, which covered the window’s weep holes. The water could not get out and rotted the wall. A simple mistake cost the homeowner a small fortune. But to be clear, many windows leak and are able to dry out with no catastrophic effects. Older houses made out of actual wood within a breathable wall have the ability to get wet and dry. Newer houses with OSB sheathing and tighter enclosures are not as forgiving. A super air tight house like mine leaves no room for error in the window install.
Window Installation On My House
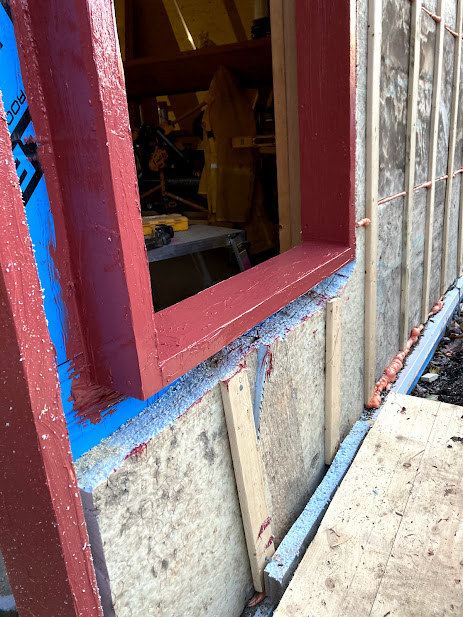
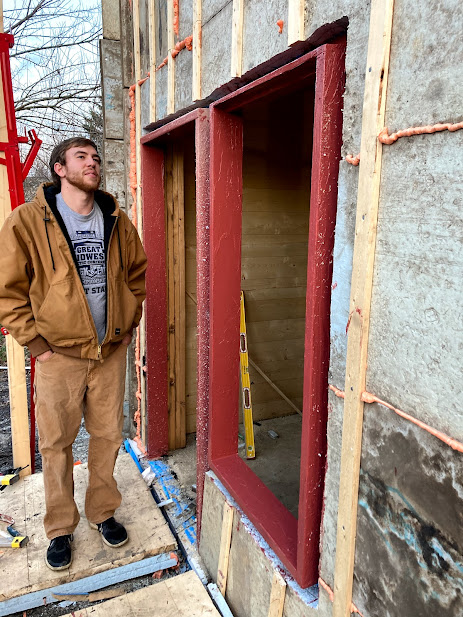
Now for the moment you have been waiting for! If you check out my framing detail you will see that the walls have no studs. Therefore I do not have a traditional window rough opening with a sill and header. My solution was to build waterproof window bucks. I simply used 2×6 SPF to build boxes matching the rough opening size of my windows. The top and bottom of each buck is sloped on a 5 degree angle. I then waterproofed them with Prosoco R Guard FastFlash. Then it was simply a matter of cutting holes in the wall to accept the window bucks and fastening them to the tongue and groove boards.To complete the window opening, I bridged the R guard to the Carlisle 705 Housewrap ensuring a completely seamless water, air, and vapor control layer.
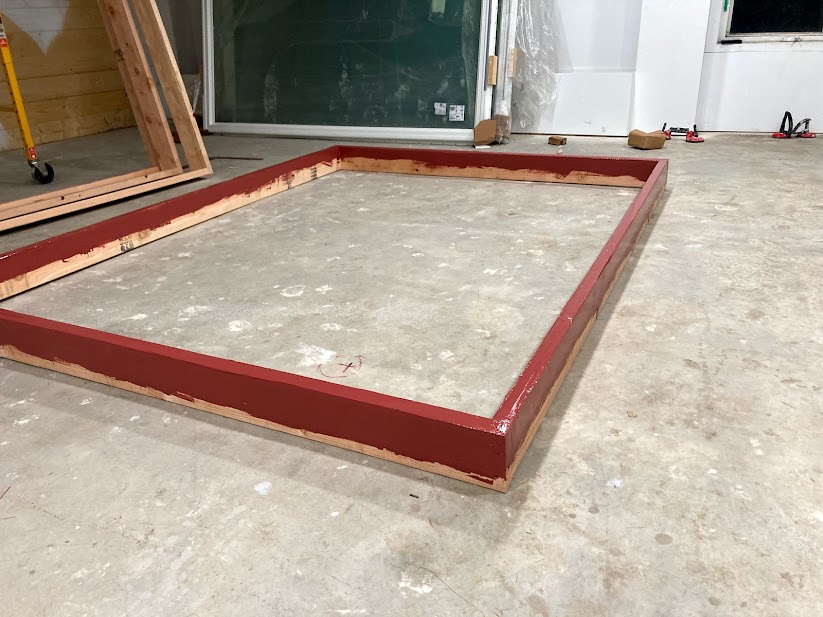
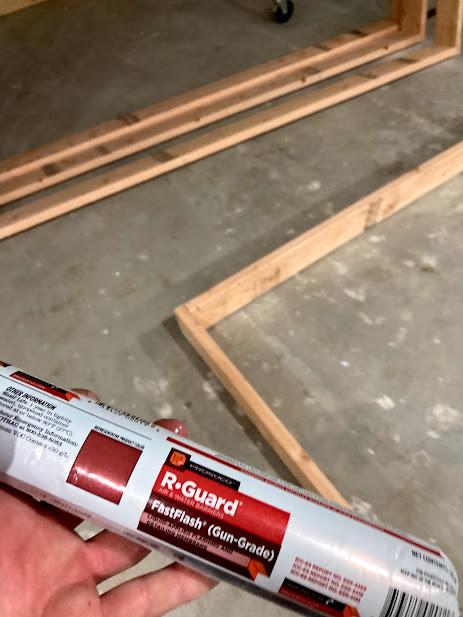
The window was then installed with careful consideration with the sill. I shimmed the bottom of the window up an ⅛” from the sill of the window buck. I then nailed the window to the buck through the nailing flange. The Prosoco is self healing, so I did not care about taping the flange to the carlisle. Then, instead of spray foaming the window to the rough opening, I used a backer rod on the inside of the window and bridged Prosoco AirDam to bond the window to the Proseco R Guard buck. I now have a continuous air sealed and water sealed window install. If water gets through the window, it will fall down to the waterproofed sloped sill and out the bottom.
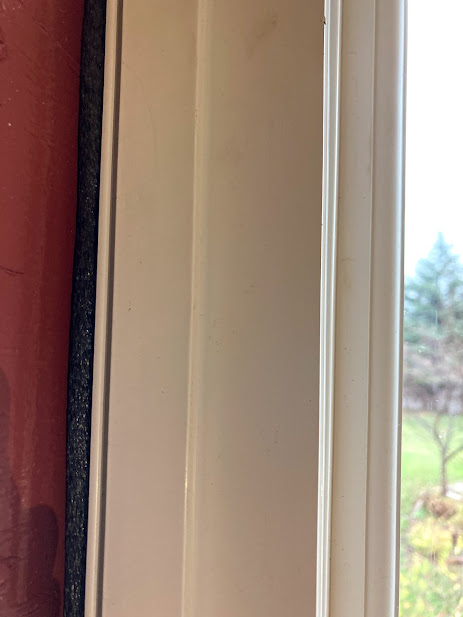
What sets this window apart from most is that it is completely sealed on the inside of the window. Most windows rely on window tape sticking to the housewrap on the outside of the window. I am relying on gravity and pressure to keep all moisture out.

Windows are good as long as they are installed correctly!
Cheers! And Build On!
